The short version is that Nomad’s APAC 20 Countries Plan was usable in Japan other than remote Hakone and was not very usable in Taiwan. I was always able to reconnect within a minute in Japan. In Taiwan, not only was data slow but I also was unable to connect to the network for more like 3-5 minutes at a time.
I decided to try those eSIMs that you purchase ahead of time instead of at the airport. The downside is normally that data SIMs purchased in the airport usually have better coverage and eSIMs bought online sometimes put you at a lower priority in the network.
I decided to go with Nomad, which was having a sale on regional data plans. US$26 for 20 GB over 45 days for a regional Asia plan suited my needs very well— if it worked. I installed the Nomad app on the unlocked phone I intended to use, because I read that the app would be able to track my data usage and so help me better manage my data.
I did make sure that my destination countries would be covered. Nomad did have a list of the networks I would be on in the APAC 20 Countries Plan:
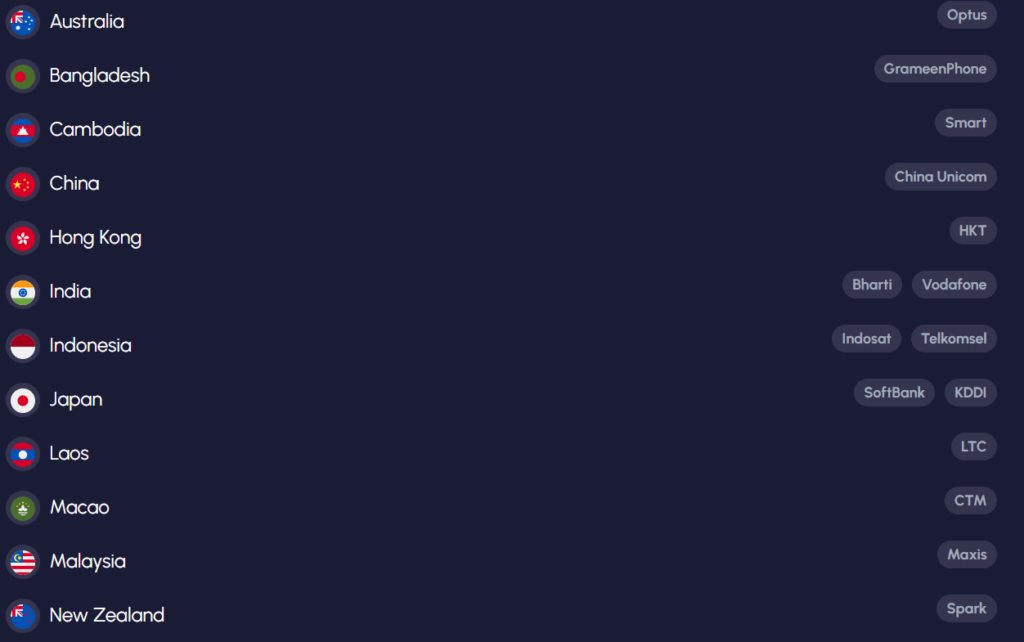

I have used CHT in Taiwan, so that looked legitimate.
Nomad also has a 15 Countries Plan that is more expensive. The network for Japan looked like the better one and there would now be 3 possible networks for Taiwan, so higher quality of connection / coverage area is probably the benefit. Also, the 15 Countries Plan claims it supports 5G speed in some countries (but does not specify which ones).
Given my particular unlocked phone is older and does not support 5G anyway, I opted for the 20 Countries Plan with 20 GB active for 45 days. By getting a 20 GB plan for about 38 days of Asia travel, I would need to keep under 0.5 GB per day. I did not intend to do any streaming while on-the-go, and I knew there would likely be hotspots available at hotels, Airbnbs, coffee shops, and sometimes department stores.
After purchase, one has to install the eSIM. You are warned that you can only install the eSIM once, so do not uninstall it! Installation was very easy, because I selected to install the eSIM automatically.
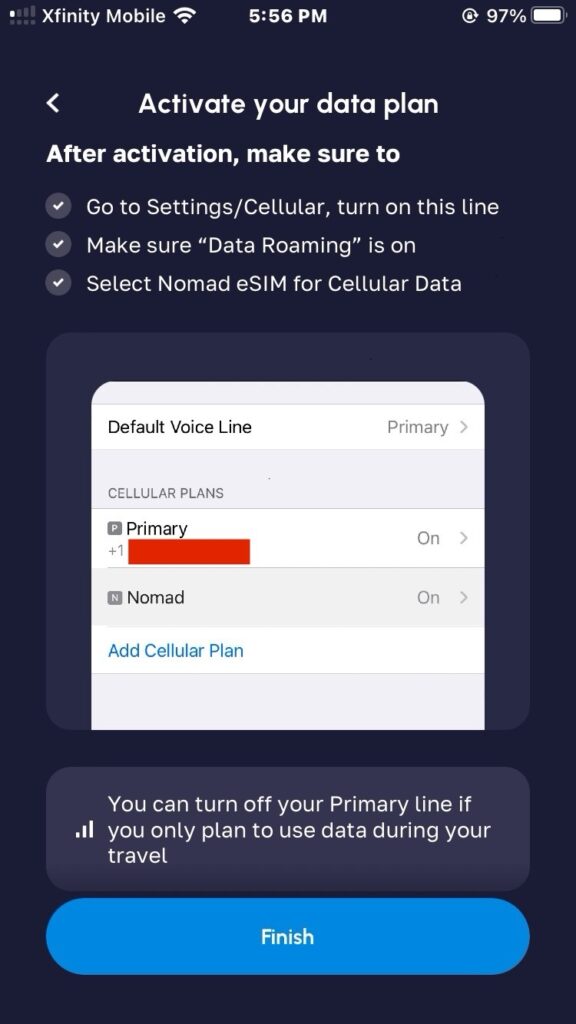
I adjusted my settings while on the plane to avoid any inadvertent charges. Upon arrival in Japan, it took about 15-20 minutes to activate. In that time, I sent a ticket to Nomad only to discover that it was activated after I exited the ticket-writing screen.
The device functioned fine for searching on maps and browsing the internet. It sometimes lost connection but I could almost always recover the connection within a minute. (The exception was while waiting in line for rides at Disneyland, funnily enough.)
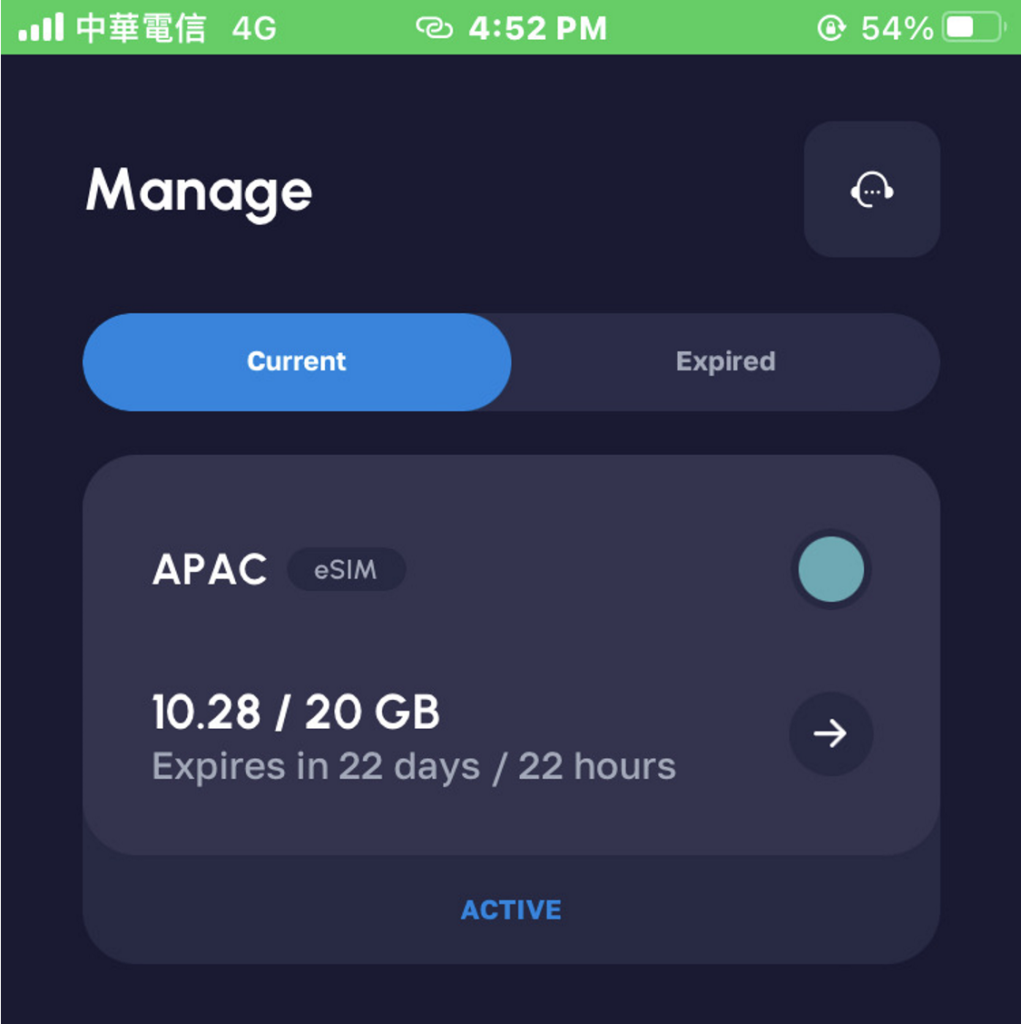
The app was helpful for tracking data usage and feeling comfortable that I still had the right amount of data left. I got through ~3 weeks with under 11 GB. I intended to be less careful for the last two weeks, but I ended up being unable to even connect to the network smoothly in Taiwan!
The way this data SIM works is that users are at a lower priority on the network Nomad has paid to use. Apparently, I was a very low priority in Taiwan.
Speed Tests
My main locations were:
Tokyo, Japan
I must not have screenshot this speed test. I remember that the data seemed to function fine but took longer to find the connection than when I was in Kyoto.
Nagoya, Japan
Kyoto, Japan
Kyoto had a 41.38 Mbps download with a ping of 82.

Nara, Japan
I apparently forgot to screenshot in Nara, too. I did not use my phone much if at all in Nara.
Hakone, Japan
The speed in Hakone was far from ideal at less than 5 Mbps and a ping of 110, but it was still usable if it connected. It was not always promptly connected.
Zhongli, Taiwan
I had issues connecting.
Taipei, Taiwan
If talking about the Taipei Taoyuan Airport (TPE), it was great!
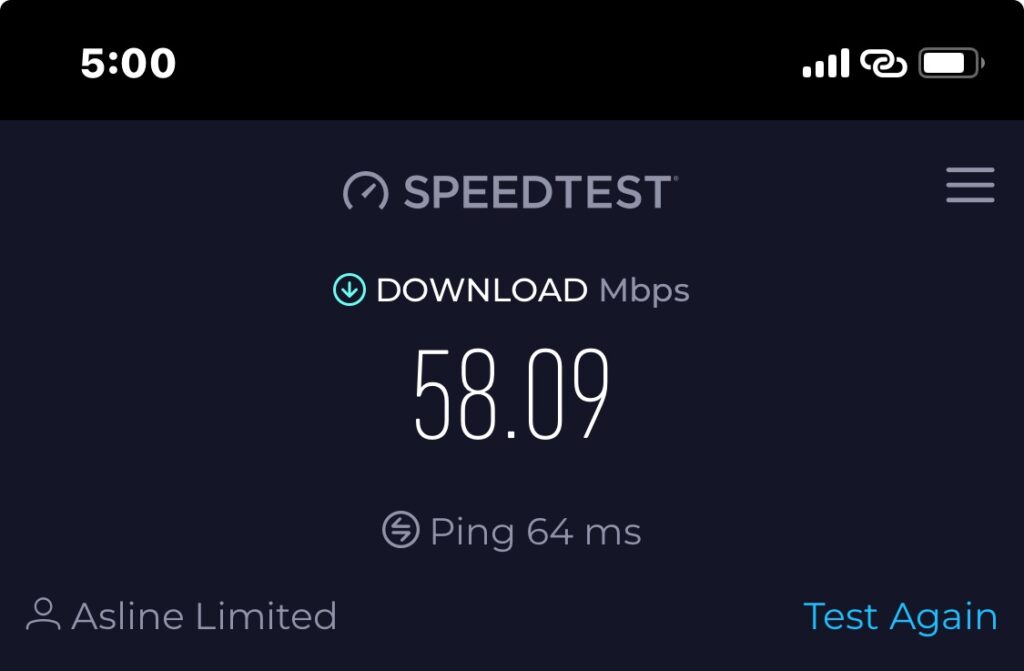
If talking about Taipei city, it was good when it connected.
Taitung, Taiwan
Had issues connecting to the internet.
Kaohsiung, Taiwan
I sort of gave up on my Nomad data SIM by this point.


